Kiln dried is a very broad term unless percentage moisture is also specified. Reading the grain orientation gets quite important especially as board width increases. Type of joint affects the importance of flatness of your boards.
If you plane boards that have only been recently sawn you best get them nailed in place before they start to cup.
Most of this can be disregarded in the OP's proposal as the pieces are narrow and probably dried enough to be stable.
If I was hard up against financial constraints I would use the narrow boards and make them quick and dirty. You cannot make a silk purse out of a sows ear!
@little_john would be familiar with that analogy.
Depending on what you are doing with them, narrow boards can be your friend!
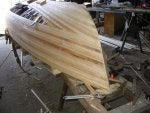
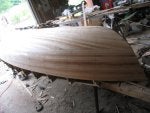
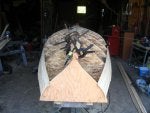
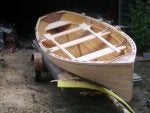
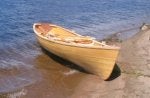
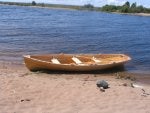
Just for some wood porn below is Miss Fit! We spent a lot of hours together!
These came entirely from home sawn white and red pine logs.


") Good luck with your project!
Good luck with your project!

